How to Install Android OS in Your Computer?
We all know about Google Android operating system which comes installed in almost all latest smartphones whether its Samsung Galaxy S5 or Google Nexus. You'll find Android OS in almost all latest touch-enabled mobile phones. It has become the most popular operating system for mobile phones and tablets.
Did you know you can install or test Google Android OS in your PC? People who don't have an Android mobile phone but want to test Android OS in their Desktop computer or laptop, will definitely find this article useful.
If you remember, we have shared a software "BlueStacks" in past which works like an Android emulator and allows you to install and run almost all Google Android apps on your Windows PC. But it doesn't provide a full experience of Google Android OS.
Today in this topic, we are going to share a fully functional Google Android OS copy which can be installed in your PC and can be used as a primary operating system. And if you don't want to install it on your hard disk drive, you can test it without installing it.
"Android-x86" is a very popular project which releases Google Android ISO image files to be installed or tested on computers. You'll find almost all Google Android versions from old 1.6 (Donut) to the latest 4.4 (KitKat).
You just need to follow a few simple steps to enjoy Google Android OS running on your PC:
First of all download the desired Android version's ISO image file from Android-x86 website:STEP 1: Download Google Android OS
Download Google Android ISO Files
Now write the ISO file to a CD/DVD or USB drive. If you want to write the ISO file to CD/DVD, you can simply right-click on the ISO file and select "Burn disc image" option. It'll launch Windows built-in "Disc Image Burner" program which allows you to burn ISO files to CD/DVD. Alternatively, you can take help of 3rd party disk burning software to burn ISO file to CD/DVD.STEP 2: Write ISO Image File to CD/DVD or USB Drive
If you don't want to write ISO file to CD/DVD or if you don't have an optical drive in your computer, you can create a bootable USB drive of the downloaded ISO file.
Once you create a bootable CD/DVD or USB drive to test Android, restart your PC and it should now boot using the CD/DVD or USB drive. If it doesn't, make sure the option to boot using optical drives or removable media is enabled in BIOS settings.STEP 3: Boot Your Computer Using CD/DVD or USB Drive
Some Desktops and laptops provide a direct hotkey such as F12 to select boot order at startup. Press the hotkey as soon as your computer starts and you'll be able to select the desired drive as boot media.
Once your computer starts using the CD/DVD or USB drive, it'll show following screen to install or test Google Android OS in your PC:STEP 4: Install or Test Run Google Android in Your Computer
If you don't want to install Google Android OS in your computer but want to test it virtually, select the "Live CD - Run Android-x86 without installation" option. It'll not install the OS on your hard disk but will run the OS virtually so that you can enjoy its features without worrying about your other installed OS.
But if you are ready to install Android OS in your system, choose the last option "Installation - Install Android-x86 to harddisk".
WARNING: Install Android OS on your hard disk at your own risk. We have tested and installed it in various Desktop PCs and laptops and didn't face any problem. But its an unofficial port of Android OS and may harm to your hard disk data. So take a backup of your important data first before installing Android on your hard disk.
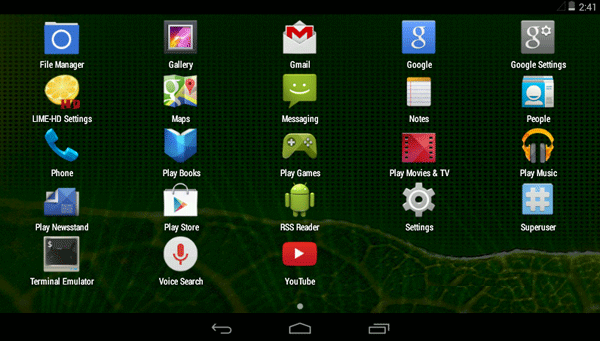
If you selected the first option "Live CD" to test drive Android in your computer, it'll take a few seconds and will start Google Android OS in front of you. You'll be able to test all features of Android OS including installing apps, etc.STEP 5: Running Google Android OS in Your PC
If you select the option to install Android in your computer, you'll need to follow a small setup wizard which will ask you to select the partition to install Android OS, to install Grub loader to dual boot between Android and other installed OS (click on YES button), etc. Select the partition and other things carefully and the setup wizard will finish in a few moments.
That's it. Now you are ready to enjoy fully functional Google Android operating system in your laptop or Desktop PC.
NOTE:
If you selected "Live CD" option, nothing will be changed in your computer system and you'll get your old system and operating system back once you start your computer normally without booting using Android CD/DVD or USB drive.
If you installed Android using "Installation" option, you'll get GRUB loader screen at every system startup which will allow you to start Google Android OS or your previously installed OS such as Windows, Linux, etc.
Enjoy With Roushan Mishra


Use Google Places Autocomplete API in Android Search Dialog
ReplyDeleteIn this article, we are going to develop an android application with a search panel.
The search panel permits users to search various places using Google Places API and shows the result as a marker within the Google Maps android API V2.
http://geekonjava.blogspot.com/2016/07/use-google-places-autocomplete-api-in-android.html